Integrating PhonePe payments in your Flutter app enhances user convenience by providing a popular digital wallet for transactions. Here’s a detailed step-by-step guide for integrating PhonePe in Flutter.
1. Set Up Flutter Project
Begin by ensuring you have a Flutter environment set up. If not, create a new project:
flutter create phonepe_integration
Then, open your project in an IDE of your choice.
2. Add Dependencies
To use PhonePe’s SDK in your Flutter project, add the necessary dependency to your pubspec.yaml:
dependencies:
  phonepe_payment_sdk: ^<latest_version>
  crypto: ^3.0.1
Ensure you replace <latest_version> with the latest version available. This phonepe_payment_sdk package is crucial for accessing PhonePe’s API in your Flutter code.
Run the following command to get the dependencies:
flutter pub get
3. Configure Android and iOS Permissions
Android Setup
Go to android/app/build.gradle and make sure the minSdkVersion is at least 21:
defaultConfig {
    minSdkVersion 21
}
In the AndroidManifest.xml, add the necessary permissions for internet access and PhonePe activity:
<uses-permission android:name="android.permission.INTERNET" />

<application ...>
    <activity
        android:name="com.phonepe.sdk.ui.PhonePePaymentActivity"
        android:exported="true" />
</application>
iOS Setup
For iOS, open your ios/Runner/Info.plist and add the following permissions for network access:
<key>NSAppTransportSecurity</key>
<dict>
    <key>NSAllowsArbitraryLoads</key>
    <true/>
</dict>
4. Platform-Specific Code Integration
You’ll need to set up platform channels to communicate between Flutter and native code.
Initialize the SDK
PhonePe’s SDK needs to be initialized before you can start any transaction. This can be done using the init() method:
PhonePePaymentSdk.init("SANDBOX", null, "<merchant_id>", true).then((val) {
  debugPrint('PhonePe SDK Initialized - $val');
  startTransaction();
}).catchError((error) {
  debugPrint('PhonePe SDK error - $error');
});
Ensure you replace <merchant_id> with your actual merchant ID.
5. Create Transaction Logic
You’ll now build the transaction logic. A typical PhonePe transaction requires merchant details, amount, and a callback URL.
Here’s how you can create and start a transaction:
import 'dart:convert';
import 'package:crypto/crypto.dart';
import 'package:flutter/material.dart';
import 'package:phonepe_payment_sdk/phonepe_payment_sdk.dart';
class PhonePePg {
int amount;
BuildContext context;
PhonePePg({required this.context, required this.amount});
String merchantId = "PGTESTPAYUAT";
String salt = "099eb0cd-02cf-4e2a-8aca-3e6c6aff0399";
int saltIndex = 1;
String callbackURL = "https://www.webhook.site/callback-url";
String apiEndPoint = "/pg/v1/pay";
void init() {
PhonePePaymentSdk.init("SANDBOX", null, merchantId, true).then((val) {
debugPrint('PhonePe SDK Initialized - $val');
startTransaction();
}).catchError((error) {
debugPrint('PhonePe SDK error - $error');
});
}
void startTransaction() {
Map body = {
"merchantId": merchantId,
"merchantTransactionId": "transactionId_${DateTime.now().millisecondsSinceEpoch}",
"merchantUserId": "user123",
"amount": amount * 100, // in paise
"callbackUrl": callbackURL,
"mobileNumber": "9876543210",
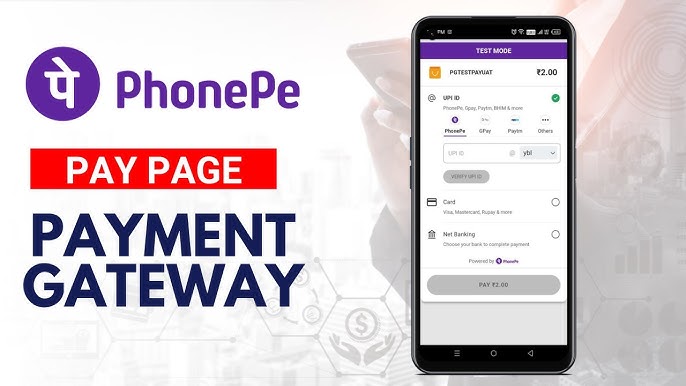
"paymentInstrument": {"type": "PAY_PAGE"}
};
String bodyEncoded = base64Encode(utf8.encode(jsonEncode(body)));
var byteCodes = utf8.encode(bodyEncoded + apiEndPoint + salt);
String checksum = "${sha256.convert(byteCodes)}###$saltIndex";
PhonePePaymentSdk.startTransaction(bodyEncoded, callbackURL, checksum, "")
.then((success) {
debugPrint("Payment success $success");
// Redirect user to your success screen
}).catchError((error) {
debugPrint("Payment failed $error");
});
}
}
6. Handling Success and Failure
Once the transaction is completed, you’ll need to handle the results, whether it succeeds or fails. You can navigate to a success or failure screen depending on the result:
PhonePePaymentSdk.startTransaction(bodyEncoded, callbackURL, checksum, "")
    .then((success) {
  debugPrint("Payment success $success");
  Navigator.pushReplacement(
    context,
    MaterialPageRoute(builder: (context) => const SuccessScreen()),
  );
}).catchError((error) {
  debugPrint("Payment failed $error");
  Navigator.pushReplacement(
    context,
    MaterialPageRoute(builder: (context) => const FailureScreen()),
  );
});
7. Testing Your Integration
You’ll want to ensure the integration works as expected before going live. Test in PhonePe’s Sandbox environment before switching to production. You can pass test merchant IDs and use the sandbox URLs for callback responses.
8. Switch to Production
Once your testing is successful, replace the SANDBOX environment and sandbox details with your live credentials:
PhonePePaymentSdk.init("PRODUCTION", null, "<production_merchant_id>", true);
Update the callback URL to the live server and ensure you’re handling sensitive data securely.
Conclusion
PhonePe integration in Flutter is straightforward when the steps are followed carefully. This guide walks you through every stage of integration, from setting up the SDK to handling transactions and managing success or failure callbacks. Testing in the sandbox environment is crucial to ensure your payment flow works seamlessly before going live.
By following these steps, you can offer a secure and convenient payment method for your Flutter users.