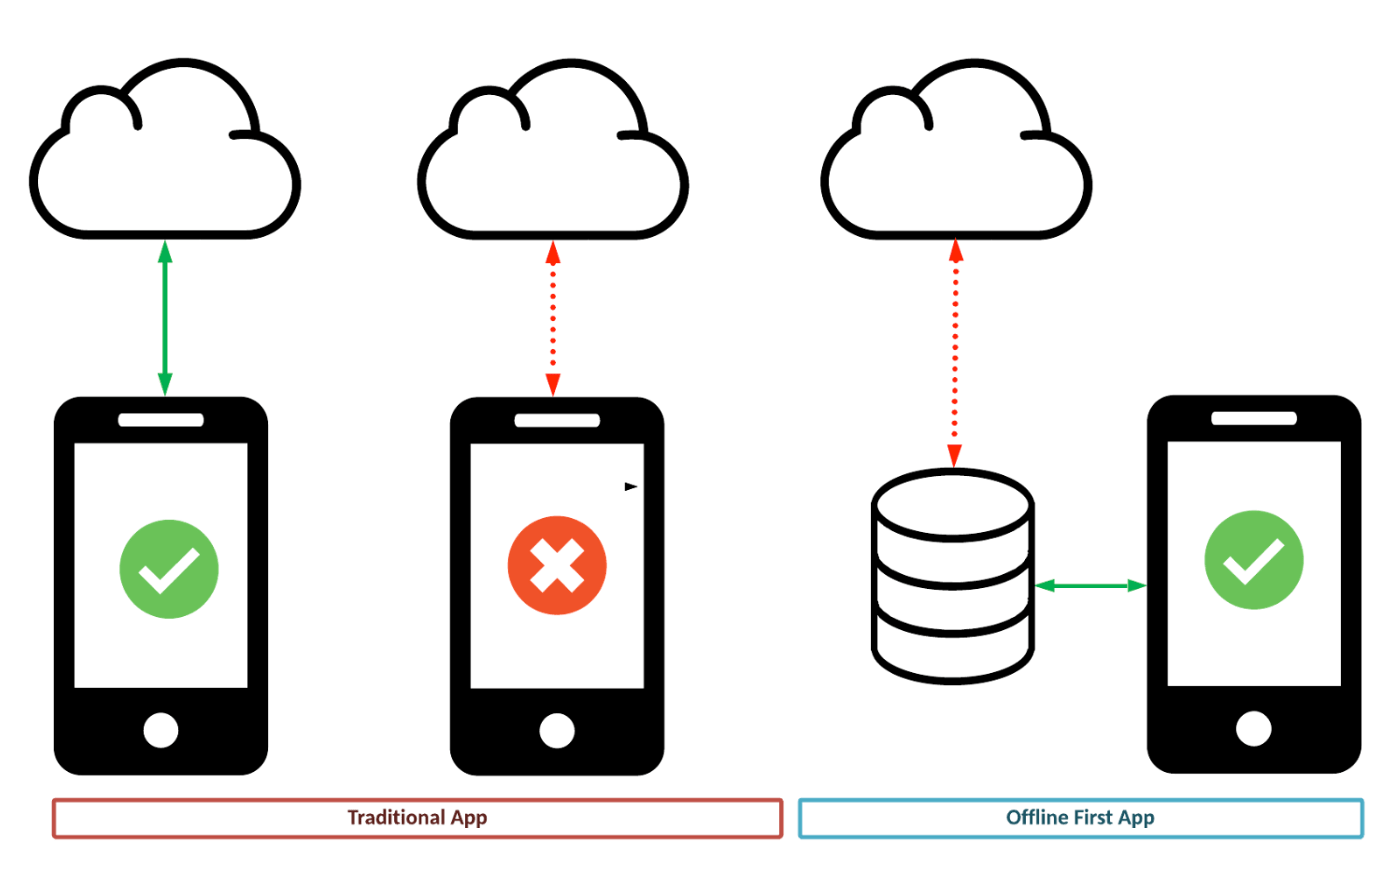
In today’s world, users expect apps to work seamlessly, even when they’re offline. Whether it’s a note-taking app, a task manager, or an e-commerce platform, the ability to sync data offline and push it to the server once the network is restored is a crucial feature. In this blog, we’ll explore how to implement offline data syncing in Flutter, ensuring your app remains functional and reliable even without an internet connection.
Why Offline Data Syncing?
Offline data syncing is essential for:
- Improved User Experience: Users can continue using the app without interruptions, even in areas with poor or no connectivity.
- Data Integrity: Ensures that no data is lost when the app is offline.
- Efficiency: Reduces the need for constant network requests, saving battery and bandwidth.
Key Components for Offline Data Syncing
To implement offline data syncing in Flutter, you’ll need the following:
- Local Database: To store data offline (e.g., SQLite, Hive, or ObjectBox).
- Network Connectivity Check: To detect when the device is online or offline.
- Background Sync: To sync data with the server when the network is restored.
Step-by-Step Implementation
Step 1: Choose a Local Database
For offline storage, you can use one of the following local databases:
- SQLite: A lightweight relational database. Use the
sqflite package.
- Hive: A NoSQL database that’s fast and easy to use.
- ObjectBox: A high-performance NoSQL database.
In this example, we’ll use Hive for its simplicity and speed.
Add Hive to Your Project
Add the following dependencies to your pubspec.yaml file:
dependencies:
  hive: ^2.2.3
  hive_flutter: ^1.1.0
  path_provider: ^2.0.11
Initialize Hive in your app:
import 'package:hive/hive.dart';
import 'package:hive_flutter/hive_flutter.dart';

void main() async {
  await Hive.initFlutter();
  await Hive.openBox('localData');
  runApp(MyApp());
}
Step 2: Save Data Locally
When the app is offline, save user data to the local database. For example, let’s save a simple Task model:
Define a Task Model
class Task {
  final String id;
  final String title;
  final bool isCompleted;

  Task({required this.id, required this.title, this.isCompleted = false});

  Map<String, dynamic> toMap() {
    return {
      'id': id,
      'title': title,
      'isCompleted': isCompleted,
    };
  }

  factory Task.fromMap(Map<String, dynamic> map) {
    return Task(
      id: map['id'],
      title: map['title'],
      isCompleted: map['isCompleted'],
    );
  }
}
Save Data to Hive
void saveTaskLocally(Task task) {
  final box = Hive.box('localData');
  box.put(task.id, task.toMap());
}
Step 3: Check Network Connectivity
Use the connectivity_plus package to check if the device is online or offline.
Add the Dependency
dependencies:
  connectivity_plus: ^3.0.3
Check Connectivity
import 'package:connectivity_plus/connectivity_plus.dart';

Future<bool> isOnline() async {
  final connectivityResult = await Connectivity().checkConnectivity();
  return connectivityResult != ConnectivityResult.none;
}
Step 4: Sync Data with the Server
When the network is restored, sync the locally stored data with the server.
Define a Sync Function
Future<void> syncDataWithServer() async {
final box = Hive.box('localData');
final tasks = box.values.map((map) => Task.fromMap(map)).toList();
for (final task in tasks) {
try {
await syncTaskWithServer(task);
box.delete(task.id);
} catch (e) {
print('Failed to sync task: ${task.id}, Error: $e');
}
}
}
Future<void> syncTaskWithServer(Task task) async {
await Future.delayed(Duration(seconds: 1));
print('Task synced: ${task.title}');
}
Step 5: Automate Syncing
Use the workmanager package to sync data in the background when the network is restored.
Add the Dependency
dependencies:
  workmanager: ^0.5.1
Initialize Workmanager
import 'package:workmanager/workmanager.dart';

void callbackDispatcher() {
  Workmanager().executeTask((task, inputData) async {
    await syncDataWithServer();
    return Future.value(true);
  });
}

void main() async {
  await Hive.initFlutter();
  await Hive.openBox('localData');
  Workmanager().initialize(callbackDispatcher);
  runApp(MyApp());
}
Trigger Background Sync
void triggerBackgroundSync() {
  Workmanager().registerOneOffTask(
    'syncTask',
    'syncData',
    inputData: <String, dynamic>{},
  );
}
Step 6: Handle Offline and Online States
Combine everything to handle offline and online states seamlessly.
Example Usage
Future<void> addTask(Task task) async {
  if (await isOnline()) {
    await syncTaskWithServer(task);
  } else {
    saveTaskLocally(task);
  }
}

Future<void> checkAndSyncData() async {
  if (await isOnline()) {
    await syncDataWithServer();
    triggerBackgroundSync();
  }
}
Conclusion
Implementing offline data syncing in Flutter ensures that your app remains functional and reliable, even without an internet connection. By using a local database like Hive, checking network connectivity, and syncing data in the background, you can provide a seamless user experience.
With the steps outlined in this blog, you can easily add offline data syncing to your Flutter app. Start building more resilient and user-friendly apps today!
If you found this blog helpful, share it with your fellow developers and let me know in the comments if you have any questions or suggestions. Happy coding!